You can now also keep up with what's happening on the MC-95 Reverse Trike Motorcycle Group page on Facebook! Check it out.
Gearbox Oil Change
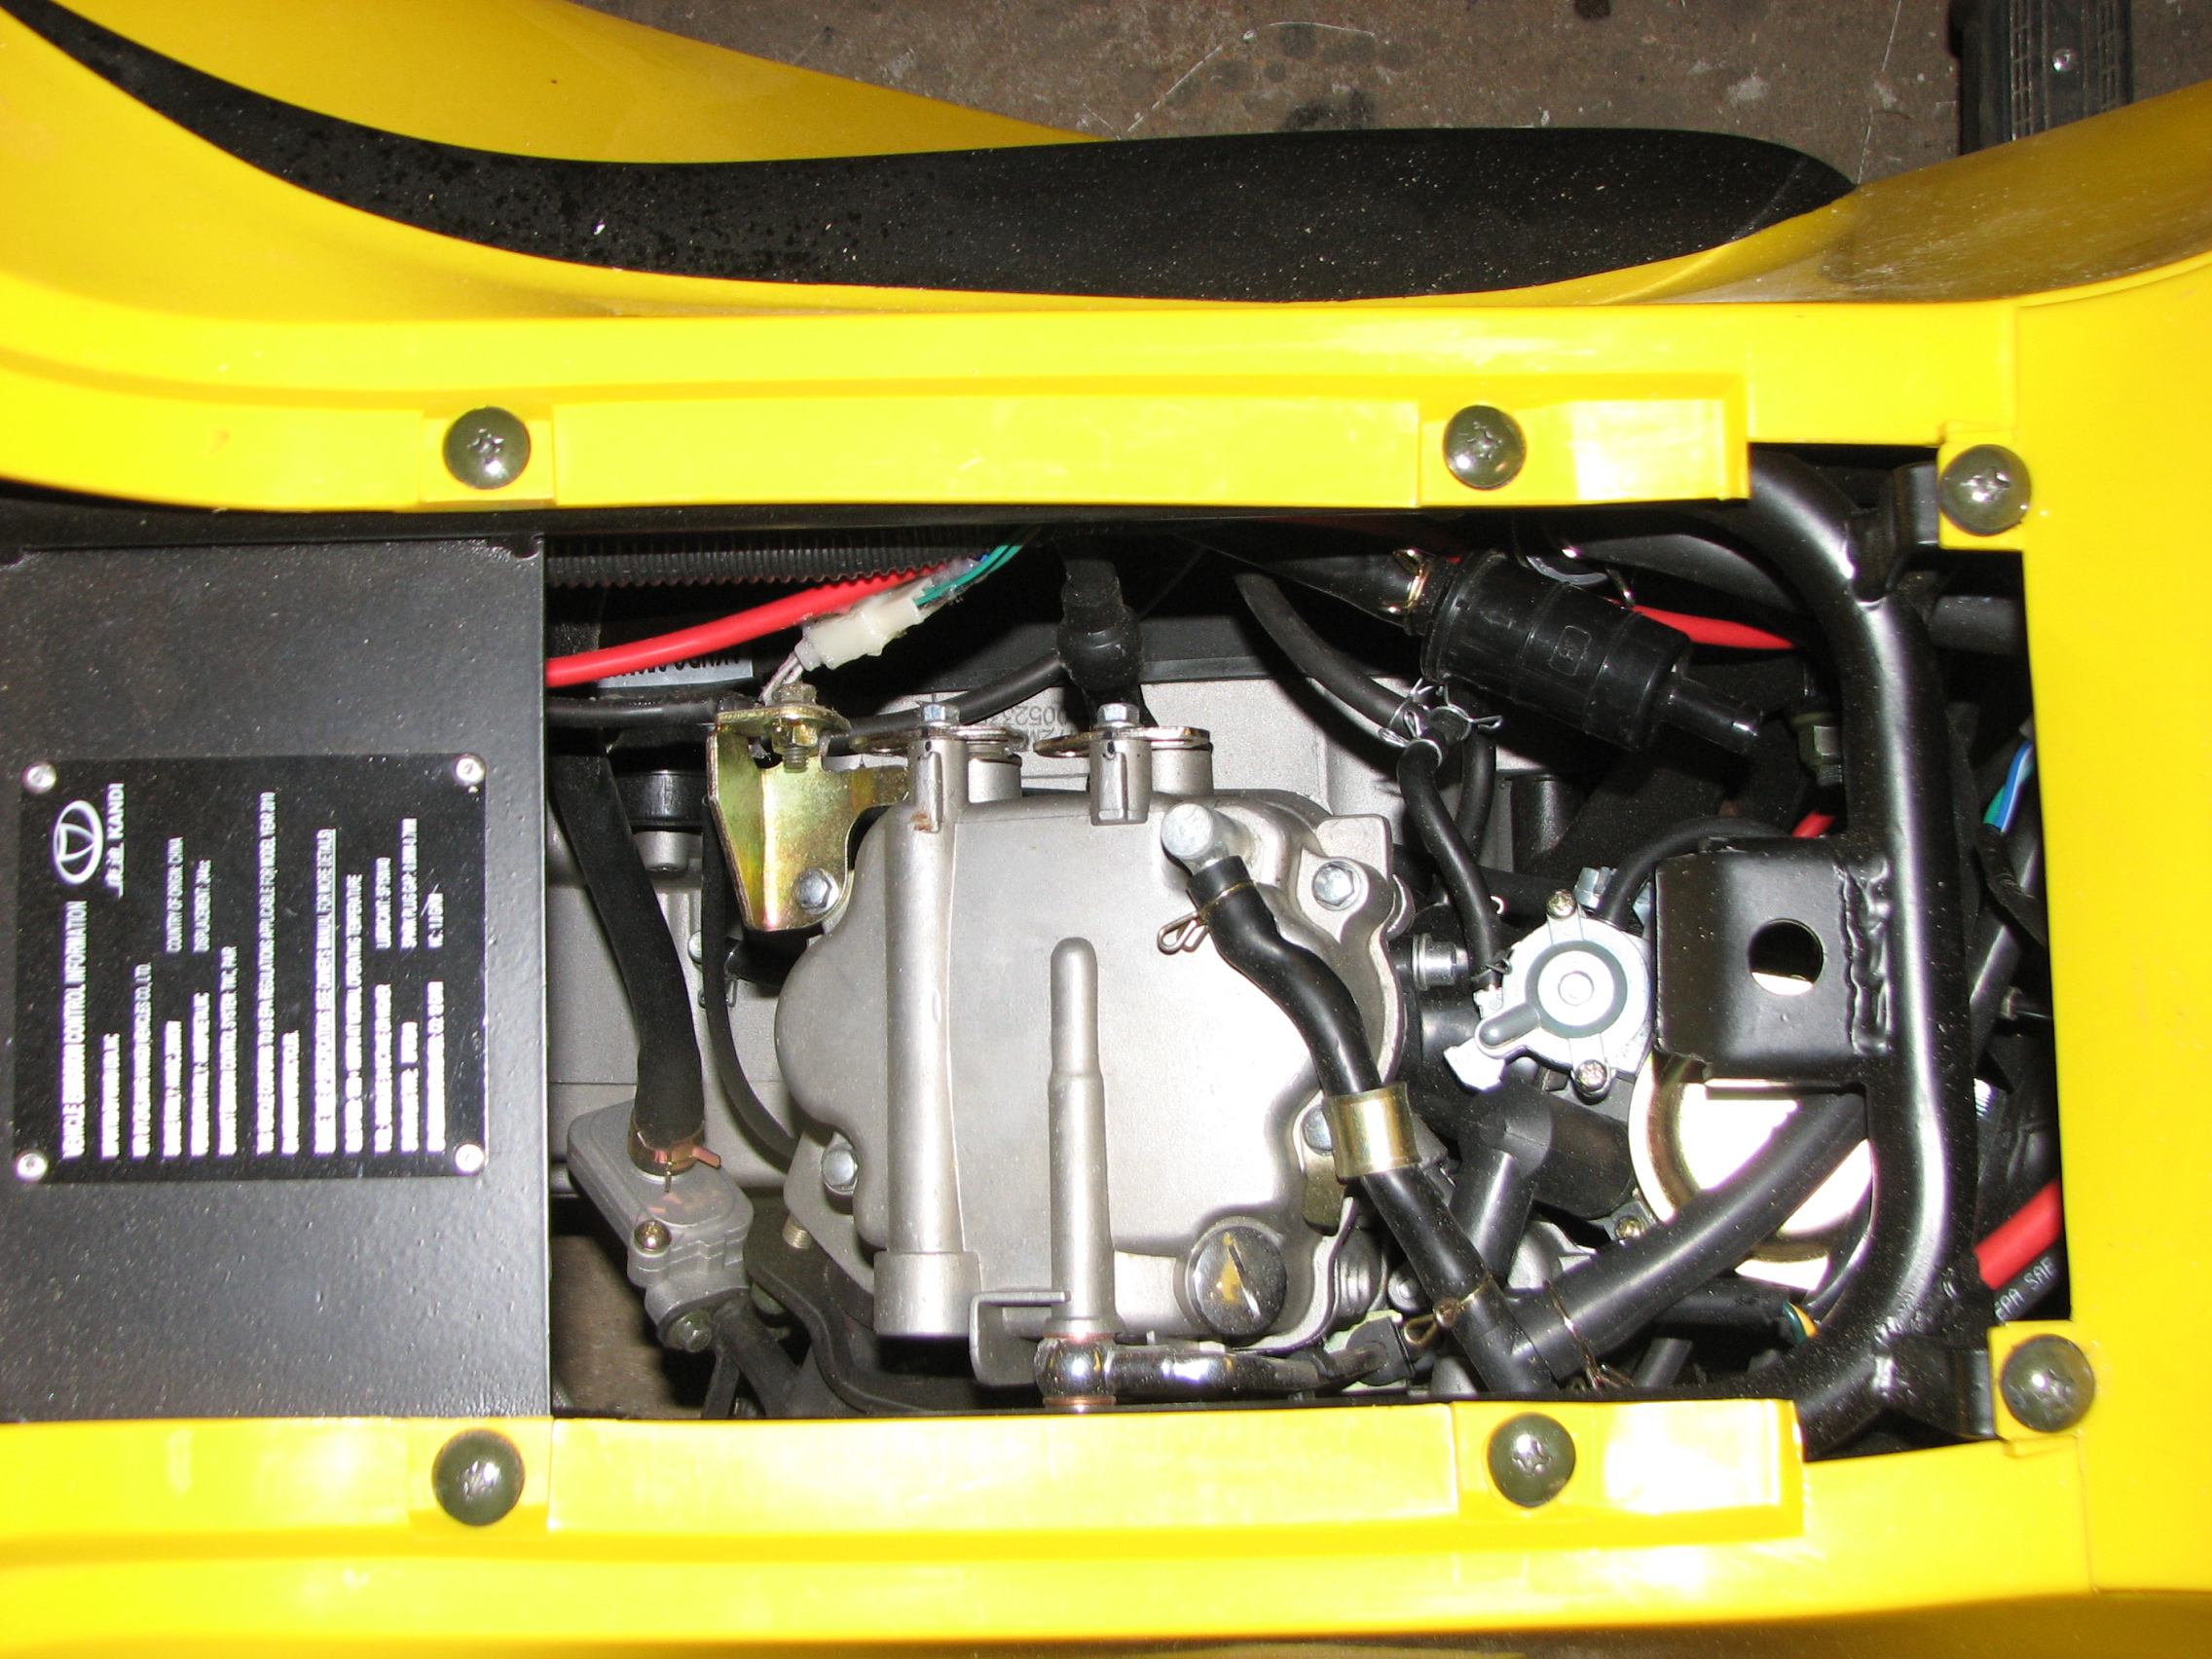
Fred in Mississippi sent me these excellent photos showing some of the parts you will need to find:![]() Gearbox oil filler bolt. Note that this is a very small hole! I fitted a thin tube into the 6mm (<6mm) hole, and fitted it over the nozzle om the 85W/90 gear oil bottle to squirt the oil into the hole. It takes ages to squeeze it in. Warming it up would probably help. I did mine on a 40F day. Kevin
Gearbox oil filler bolt. Note that this is a very small hole! I fitted a thin tube into the 6mm (<6mm) hole, and fitted it over the nozzle om the 85W/90 gear oil bottle to squirt the oil into the hole. It takes ages to squeeze it in. Warming it up would probably help. I did mine on a 40F day. Kevin
Location of the Gearbox Drain Plug ![]()
If you are really new to maintenance you may find help and inspiration in the following manual. Click on any of the links below to see them. If you have them please let me have a review :
Maintenance & Helpful Tips
This page may be helpful when you have to do maintenance. Note that you are totally responsible for any adjustments or changes to your trike.You must not assume that any information or advice on this website is correct or accurate. Use it at your own risk. Take responsibility for your own actions!
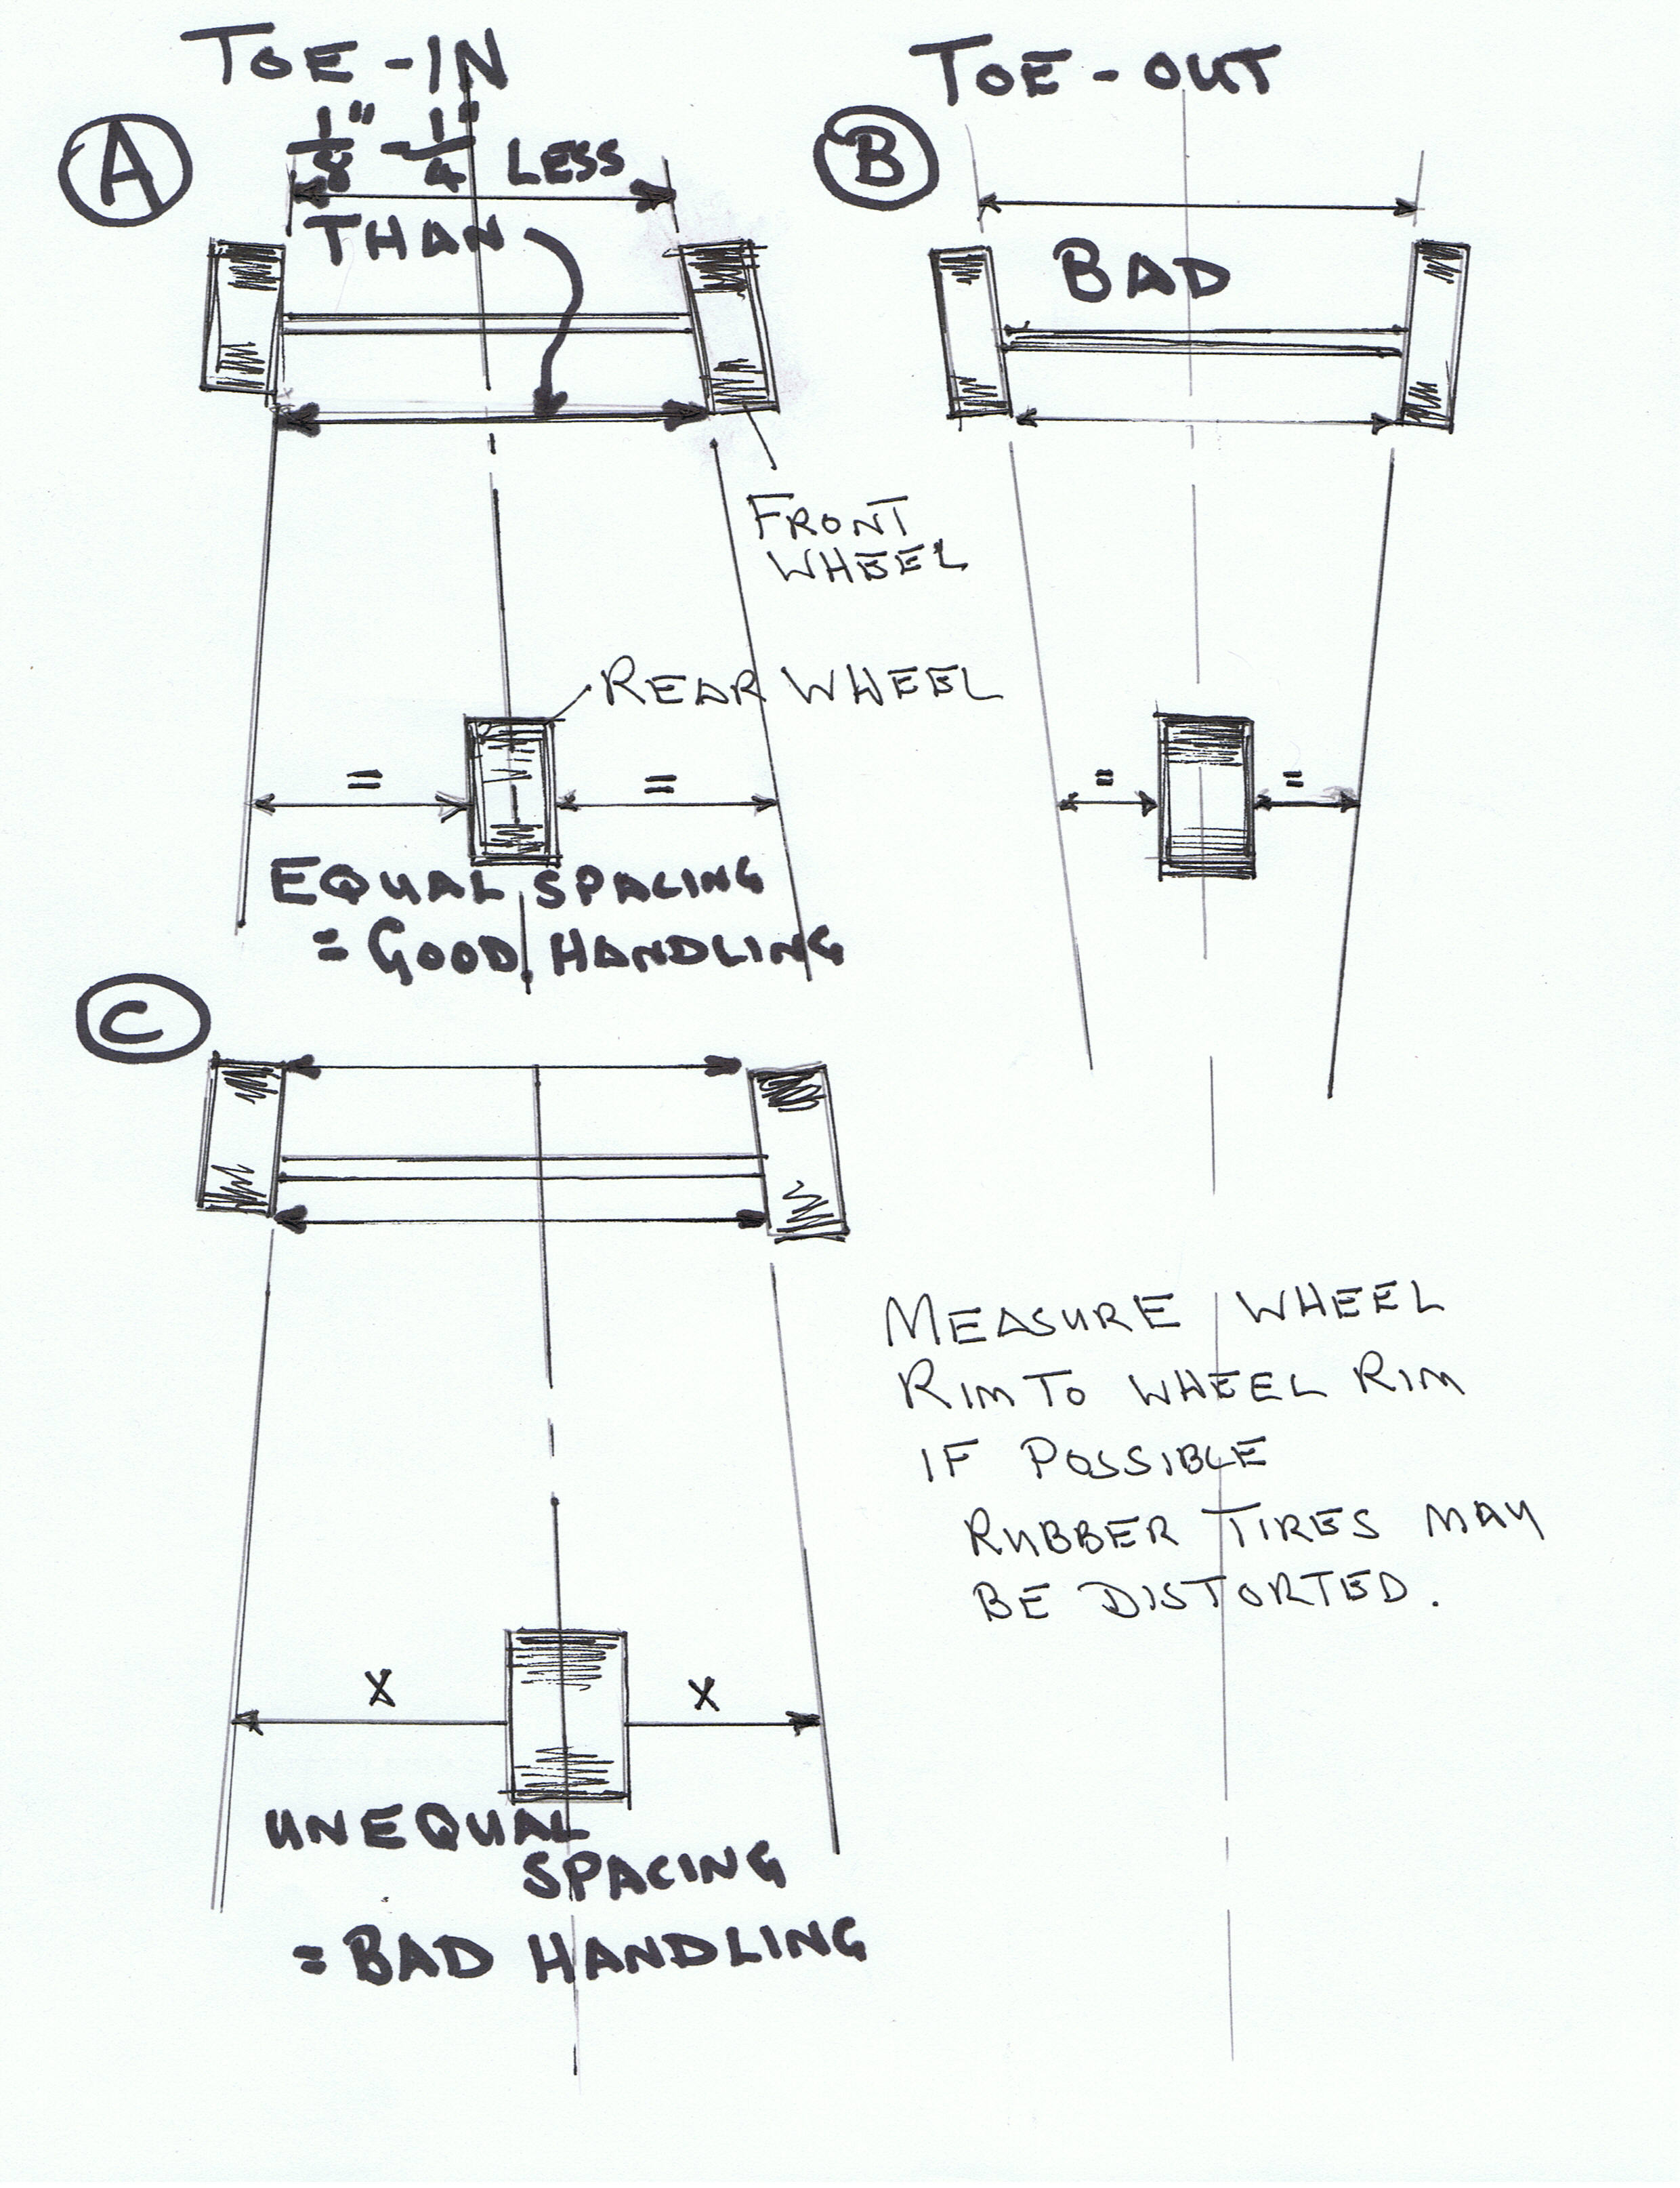
Check the Wheel Alignment and Toe-In Before you start Riding
It is vitally important that you check the wheel alignment and toe in BEFORE you start to ride your MC-95-250 reverse Trike!
None of them seem to be set up properly when delivered. So, here is the method I used:
-
Position the handlebars square the the frame - I use the bottom of the instrument panel and line it up with that.
-
Clamp a length of wood from the left handle grip to the left rear seat handle to hold the bars parallel.
-
Make up a length of of wood ( e.g. 1" x 1 1/4" x 6'-7') with enough extra Packing pieces to have it touch the inside of the tire rim, but not the rubber, on the front wheel. It should be long enough to go past the rear tire. I'll call this the Measuring Stick A
-
Place another piece of wood on the lower A frame (1 1/4" x 1 1/4" x 12" approx) to rest the Measuring Stick A on so that it can rest with the Packing piece touching both the front and rear edges of the inner rim. Gently slide the Measure Stick A back and forth so that it rests snugly.
-
Go to the rear tire and measure the distance from the rim to the inner (or outer if you prefer) edge of the Measuring Stick A
-
Go to the other side of the trike and carry out [4] to [6] steps.
-
[ Make a note of both of these measurements - they should be the same amount. If not one of the front wheels is out of alignment!
-
[Loosen both the inner and outer locknuts on the Track Rods. (It is not a bad idea to put a piece of masking tape on the rods and mark the current top of each rod) NOTE that there are flats in the track rod to take a wrench.
-
Now adjust each Track Rod by turning it forwards or backwards to make each side give the same measurement at the rear wheel. You probably only need to adjust one side.
-
Now make up another Measuring Stick (Measuring Stick B). I made mine from a straight 3/8" x 3/8" length of wood, long enough to fit from one front wheel to the other. Put a small nail (panel pin) about 1" in from one end. It needs to stick out about 3/8" max though the wood. This is easier, more rigid and more accurate than a tape measure.
-
Hook the nail into the CENTER groove on the REAR of one tire. Pass the Measuring Stick B under the trike frame, keeping it level, so that it crosses the REAR of the other front tire, at about the same height off the ground.
- Place a pencil mark at the INNER edge of the CENTER groove on the Measuring Stick B, where the stick crosses the tire. Carry this mark around the wood. This is the Rear measurement for the Toe-IN.
-
Hook the nail into the CENTER groove on the FRONT of one tire. Pass the Measuring Stick B under the trike frame, keeping it level, so that it crosses the FRONT of the other front tire, at about the same height off the ground.
-
Place a pencil mark at the INNER edge of the CENTER groove on the Measuring Stick B, where the stick crosses the tire. Carry this mark around the wood. This is the Front measurement for the Toe-IN.
-
With NO Toe-In the Front and Rear measurement marks would be identical. Ideally, you should see the FRONT Toe-in measurement being 1/8"-1/4" (3mm-6mm) LESS than the REAR Toe-In measurement.
-
If not, then adjust both Track Rods until you get this AND keeping the equal spacing at the rear wheel using Measuring stick A. Try to turn the track rods the same amount to keep the wheel alignment equal!
-
Rotating the Track Rod a small amount makes a big difference at the rear wheels.
-
When you finally get a 1/8" difference between the front and rear of the front wheels, AND an equal spacing at the rear wheel you have achieved perfection, grasshopper!
-
NOTE that tightening the trackrod lock nuts seems to reduce the Toe-In slightly - perfection is difficult to achieve ;-). I add threadlock to the locknuts before tightening them.
- I also add a dab of paint on the locknuts and the ends of the tracknuts to show up any movement in the future. I also place a dab of paint on the top of the track rods, about 8" front the outer ends so that I can see if they start to rotate in the future.
- This is the way I do it and it seems to work.
- While you are doing this it is a good time to make sure that the Two steering stops and tight. They are located just in front of the bottom of the steering rod. The locknuts need to be tight enough to prevent the bolts from rotating. Add threadlock when adjusting them.
Quick Links to Online Shopping:
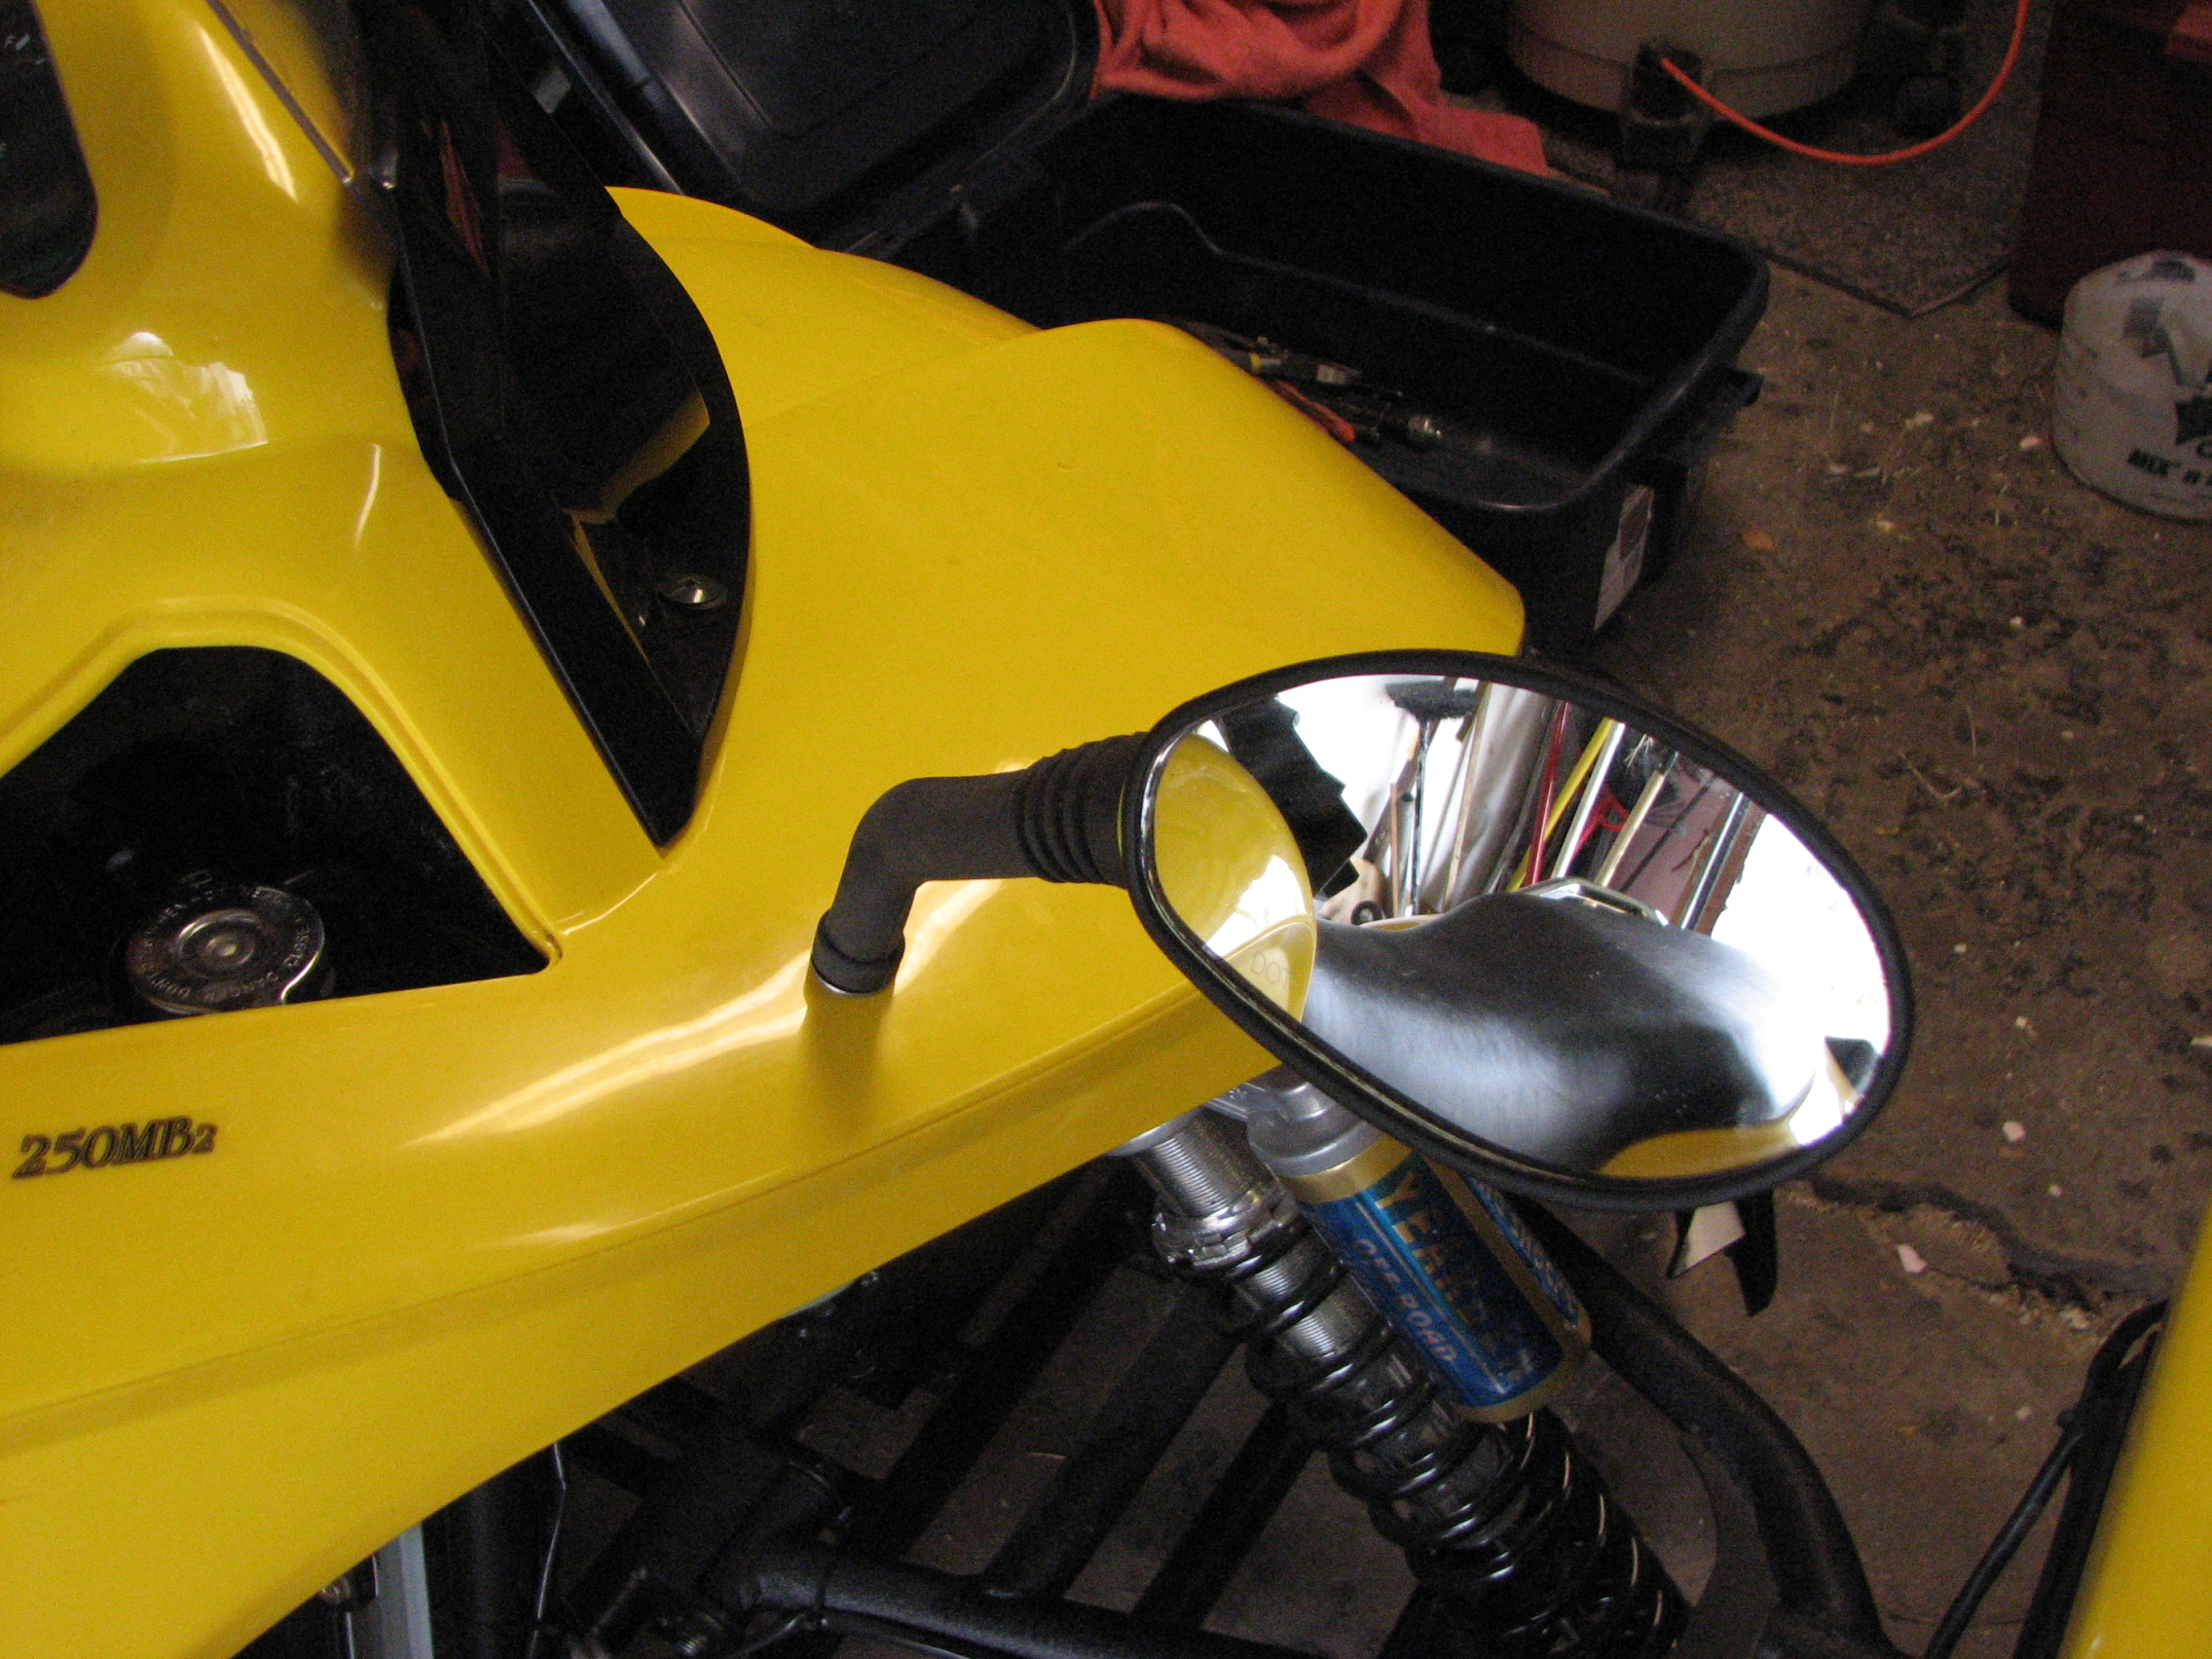
Fuel Shut Off Valve
The fuel shut off valve is hidden away under the tank, and is almost impossible to get at without removing one of the two lower side panels. The valve has three positions ON - OFF-RESERVE. The handle CENTER points at the position, but it can be confusing.
On the MC-95, as you can't reach under the tank to change the lever, it is set on RESERVE to get at ALL of the fuel in the tank), with the lever as shown below (Lever UP - pointing to the Reserve position):
The white part is the fuel filter. You can see this if you look inside your tank. THIS setting lets you get ALL the fuel out of the tank........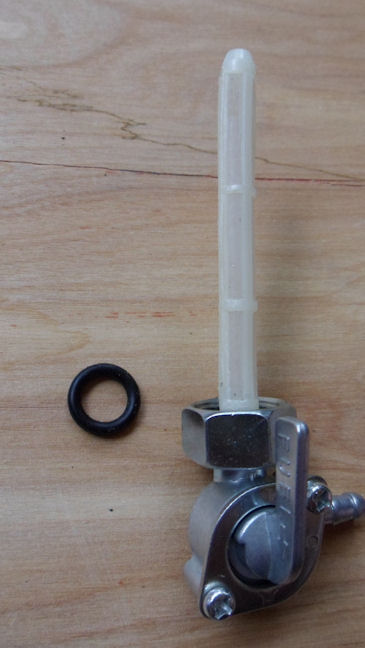
The photo below shows the valve set to ON, which would be the normal position for motorbikes, etc. You get the fuel ABOVE the plastic tube sticking out of the valve. The fuel below this is RESERVE fuel. This is not a good setting on these trikes!
I had to remove my fuel valve when the trike engine kept on starving for fuel. The likely culprit is the split O ring (actually it was a flat rubber washer) 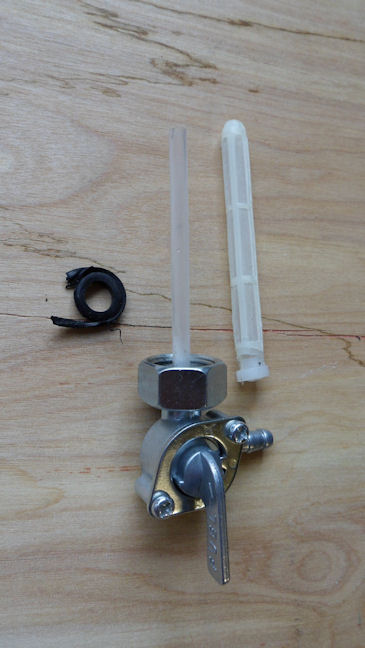 When I did a fuel flow test I was getting a dribble on the RESERVE setting and a good flow on the ON setting. I replaced the split washer with a new O ring.
Remember that if you put the lever in the ON position you will only get the first half of the tank of gas!
 This is the OFF position.
Note that you have NO RESERVE on these trikes, so check the level in the tank regularly. The fuel guage can stick!
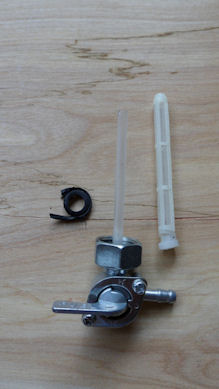
I decided that the piece of plactic pipe was not necessary, pulled it out, and just put the filter screen back. Now, I can switch up or down and I'll always get the full tank of gas available at the carb.
FYI, the valve has a nut that is right-hand threaded to go onto the fuel tank, and left-hand threaded to go onto the valve itself. Loosen the nut on the valve so that it is only just on the valve, then hold the valve in place as you tighten the nut onto the tank. It should tighten down until the rubber washer (O ring) is pressed but not squashed.
Then put the original, or a new piece of fuel pipe in place and clamp it. I use stainless steel wire, wrapped around the tube 3-4 times to form a tight coil. Then the ends are twisted with locking pliers or grips to pull the coil down onto the tube. This evenly compresses the tube to provide a good seal - it was often used on aircraft fuel pipes and so I like it better than many clamps and clips.
The True Max Speed?
Check your Speedo!
No not those! The speedometer. It seems to read innacurately. Mine is OK up to around 40mph and then it must be sniffing the gas, as it is way off. I used a GPS and found that it is way optomistic over 40mph.
When I tried to get to the top speed in managed 52mph ( GPS) with the throttle full open , running on a flat road. I weigh about 180lbs fully clothed and helmetted. The speedo was jumping all over the place but seemed to settle around 68mph (indicated) for most of the time. So, you may be going slower than you think.
I think that the MC-95 is ideal for city/town and quiet road use, but I'd avoid faster roads.
It may be possible to tune the engine CV drive for faster speeds.
The Hidden Fuse
If you don't get the lights or instrument panel, etc. lighting up when you turn the key then you may have a blown fuse.
The only electrical fuse is located on the base of the SOLENOID, which is beside the battery. Unclip the solenoid and look closely at it. You shoud see a 25AMP blade fuse. You may also see a SPARE FUSE in the rubber boot on the solenoid. Don't confuse one for the other.
I advise carrying another couple of fuses. The usual thing we do when a fuse blows is to try another one! You should really try to find out what blew the fuse before you put in a new one, but if it blows again you are stranded, so cary a couple more. I use a piece of electrical tape to hold them in the compartment, near the solenoid.
Oils
Crank Case: SAE15W/40SE, 1.2Litres +/- 0.05L (2.5 US pts approx)
Gear Case: 85W/90, 0.375Litres +/- 0.025L (0.79 US pts approx)
Battery Not Charging
If you find that your battery isn't charging put a voltage meter across the battery terminals. You should see around 12.6v or more with the trike electrics off. Now turn on the electrics using the key, and start the engine. Add a few revs (do this outside unless you like carbon monoxide) and you should see the voltage increasing on the meter. It may rise slowly, but any rise is a good thing, right!
Anything up to around 14.8volts is good. If you don't see any increase then suspect the wiring connectors. They are often the culprit. The Voltage Regulator is tucked away under the left side panel on the frame, with a connector just a bit further back. It is less likely to be the problem, so don't buy a new one right away. The other place to check the connections are on the starter solenoid, beside the battery. The red and green wires are the ones to look at. Red is the positive supply from the electrical system and the green appears to be the generated DC voltage. Put the Ov (ground) connector on the battery negative (-) terminal or on a good non-painted metal part of the frame/engine, and the +v connector on the green wire.
Measure the voltage at the connectors (don't unplug them - push a piece of wire into the connector and attach the voltage probes to them). This may show the bad connection.
Or simply pull them apart, squeeze the femail connectors a bit closer together and re-insert the male (spade) into them.
Run the engine again and see if you get a voltage increase at the battery. If you do get a higher voltage reading then apply some silicon around the fittings to keep out moisture. If not, then look at other connectors that may be in line.
Meter Readings from my MC-95
I was asked for help with tracing a better charging problem by another MC-95 Trike rider, who was having a problem with keeping a charge on the battery. He was getting ready to change the voltage regulator. I had the same problem a few weeks after getting my trike. In my case it turned out to be a poor connection in a connector.
Before you go out a purchase a new Voltage Regulator you should try checking the voltage with the engine off and then on. You should also check any connections in the wiring - they are more likely to be the culprit. You will need a electric multimeter. I use the ones from Harbor Freight (you can often get them for free with a coupon out of many magazines - look for the Harbor Freight pages).
Testing to see if the Alternator is Charging
Measure the voltage of the battery with everything turned off. Set the multimeter to 20v DC, and switch it on. Place the red (+) probe on the positive (+) terminal of the battery. Place the black probe on the negative (-) terminal of the battery. It should be somewhere around 12.6 volts to 14.2 volts approx.
I keep my battery on a trickle charger ( also from Harbor Freight) as it keeps the battery charged for the times when I may not be riding for a while. When I removed the charger and waited for 10 minutes I got 13.6volts across the battery.
I started the trike's engine and got 13.8v with just the brake light on ( you need to have the handbrake lever lock on to allow the starter to operate). My trike engine was idling at 1,800 revs/min. Releasing the handbrake lever took the voltage up to 14.1volts.
Here are the full readings for easy comarison:
Battery only (no lights on) = 13.6v after removing from a trickle charger
Voltage with engine running (idling and handbrake on/brake light on) = 13.8v
Voltage with engine running (idling and handbrake off/brakelight off) = 14.1v
Sidelights switched on at idle = 14.1v
Headlights switched on at idle = 13.7v
Revving to 3,300 revs/min gave 13.8v, and that held stable as I increased the revs to 4,400 revs/min.
You can see that you can expect to see a slight voltage INCREASE with the engine running if the VOLTAGE REGULATOR is doing its job.
If you don't see an increase in the voltage at all then follow the wires off the battery forward to where you come across any connectors. Try wiggling them around and you will probably find the cause of the lack of charging. You may want to slightly squeeze the connector parts to get a closer fit between them - don't overdo it. You just want them to make contact. Smear some silicon sealant over them to keep out moisture. It is more likely to be a wiring problem than a faulty Voltage Regulator.
Note: Revs/Min were measured using the add-on Revs/min and hour gauge similar to these from Amazon:
Adjusting the Chain (My method- use at your own risk)
For the majority of motorcycles, the correct amount of chain tension is measured when the lower run of the chain has one inch (25mm) of vertical free play at the center of the chain when the rider is sitting on the machine. I'm not sure if this also applies to the MC-95 trike, but it is probably the same.
When I first looked at the chain to find the method of adjustment I was baffled. I took a look in the Owner's Manual and that was confusing, but I eventually worked it out. The rear hub is actually an eccentric cam. By rotating it you can adjust the chain tension.
[1] Remove the three bolts holding the chain guard in place.
[2] You may have to loosen the rear brake mechanism locknut and unscrew the long bolt and that handbrake lever. This gives you almost enough space to get at all of the six hexagonal screws that help to clamp the rear wheel axle in place. (If you can use a short hexagaonal wrench you may not need to do this).
[3] Slacken off all six hexagonal screws evenly. I had to cut my hexagonal wrench down so that it would fit between the screw and the brake unit. You will probably have to do the same. I had a spare one from another set. I used a metal cutting disc in a cheap angle grinder (Harbor Freight Tools) to cut the hex wrench to size. Loosen the lower three hex screws first and that will make the top ones slightly easier to loosen.
[4] In the toolkit there is a large C shaped wrench. This is used in the notches you will see on a silver colored part of the hub, between the chain sprocket and the rear wheel axle hub. To TIGHTEN the chain hook the C wrench into one of the notches, and ROTATE it CLOCKWISE. I had to tap the wrench with a rubber mallet to get it to move - if it does not rotate easily then slacken the six hexagonal screws a bit more. To LOOSEN the chain, rotate the C wrench COUNTER-CLOCKWISE.
[5] Once you have the chain tension correct, you can tighten the six hex screws -start with the lower middle one then the top middle one, then diagonally opposite screws , and repeat the tightening sequence until you have then tight with the hex wrench. Do not overtighten.
[6] If you removed the rear brake adjuster bolt and locking nut then screw the bolt in so tha the brake is aplied then the handbrake lever is applied, and releases when the lever is released. Tighten the locking nut, whislt holding the bolt. Recheck the parking brake and readjust if necrssary. The parking brake should hold the trike in place when you push on the handlebars, but should release completely when the lever is released.
[7] Apply some chain lube, such as Liquid Wrench Chain Lube, from time ot time to lengthen the life of the chain and sprockets.
[8] Replace the chain guard. Put some Loctitie Blue or other threadlock solution (Harbor Freight sells cheap bottles that seem to work just fine) on the three bolts and don't overtighten them - don't squash the rubber washers.
{9] Recheck the tension after a few miles.
Useful Manuals
These may be useful manuals. They cover the typical setups used on Scooters and ATVs, which happen to often be the same or similar to the MC-95 Reverse Trike. Check them out and if you find them helpful please let me know.
Quick Links to Online Shopping:
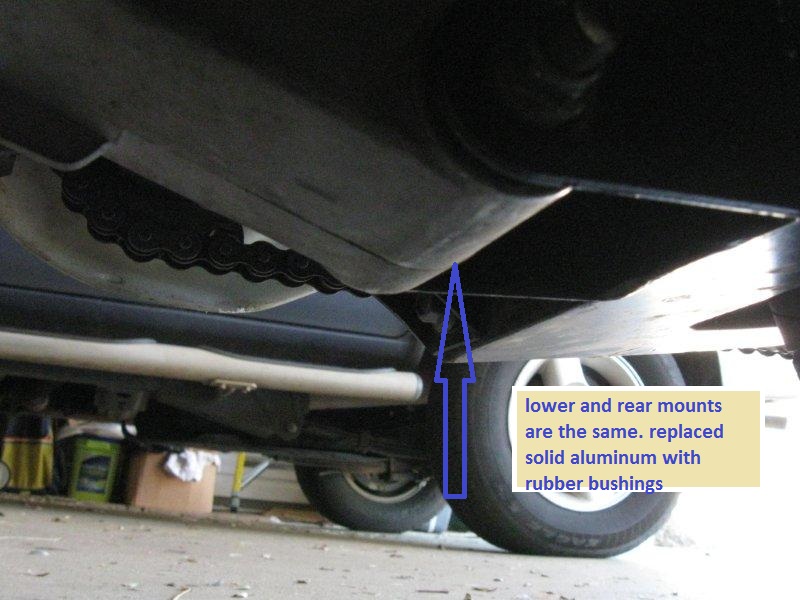
Stiff Steering and Hard Suspension
I noticed that Dean's steering was very stiff on his new MC-95 reverse trike. I had taken it out for a couple of test rdies after setting up the wheel alignment, toe-in, and several other minor adjustments. Compared to my MC-95 I could tell that the steering was stiff and that the front suspension was hard.
I loosened the locking nut at the bottom of the steering column, which seemed to make the steering feel more friendly. The suspension will probably soften up once the susuension has been worked for a couple of hundred miles. Mine is much nicer after about three hundred miles that I no longer have the focus so much on the steering, and the suspension is much better.
Playing with the Carburetor
If you are looking to improve the performance of your MC-95 you may want to consider changing the main jet size and the needle jet setting.
I just came across this great article : Jetting and Understanding your CV Carburetor Check it out before doing any adjustments.
Looking for more Information?
| Check out my other Websites: |